Survey Methods
Magnetic Island Reef Monitoring Survey Methods
STEP 1 – before you go
- Review the reference information for the natural features at the site you plan to survey (refer to the MAP on this page).
- Make sure you have the correct snorkelling equipment for the task at hand, and that you wear a lycra suit or wetsuit to prevent marine stings.
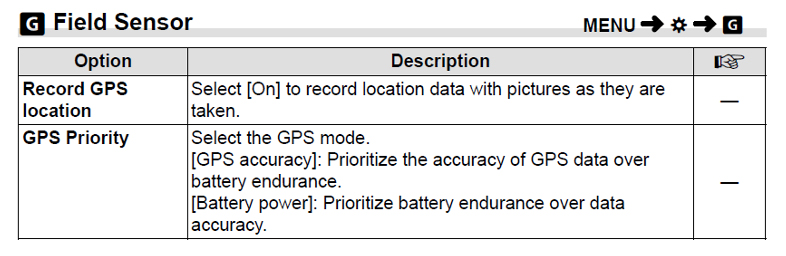
- Check that the camera battery is full, that the correct date and time are set, and that the GPS function is turned on.
In the Olympus TG-6 camera:
STEP 2 – at the site
- Locate the natural features that mark the start and end of the photo-transect, and do a test swim along the transect to check the depth.
- When ready to take geo-tagged images at the site, hold the camera above the water so the GPS can acquire a satellite signal. This may take up to a minute for the first fix, but then should only be 10-20 seconds for subsequent fixes. Check the satellite icon on the screen is not flashing to confirm signal has been obtained.
- Orientate yourself to the natural feature that marks the start point of the photo transect, and take a photo of your hand to mark the start of the photo-sequence.
NOTE: GPS signals cannot travel through water. The camera MUST BE ABOVE the water to obtain a signal and include this information on the images.
STEP 3 – taking the first image
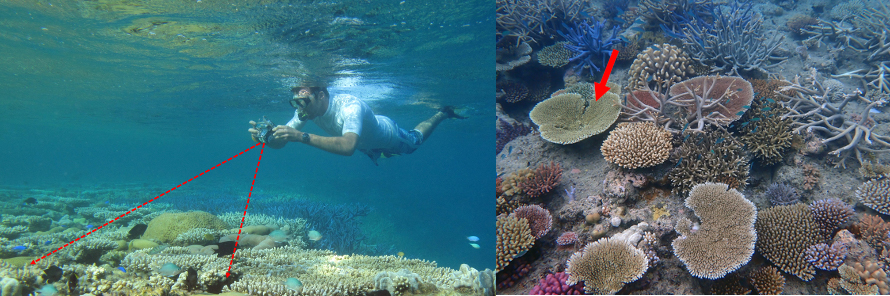
- After checking your camera has GPS signal, put the camera under the water and take the first survey image from about 1.2m to 1.5m above the reef surface, looking forward and down at a 45º angle.
- Swim down if necessary, to get the camera the right height above the reef. It should look like this:
STEP 4 – taking the second image
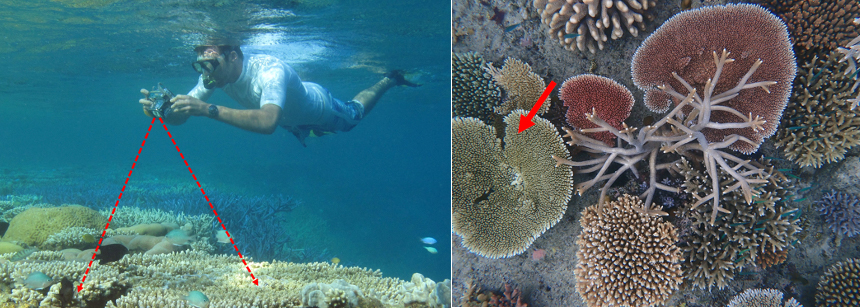
- Go forward and take a second picture, from 1.2m – 1.5m above the reef, pointing the camera straight down toward the bottom. Elements from the first picture have to appear in the second one. It should look like this:
STEP 5 – completing the survey
- Move forward a few meters along the photo-transect toward your reference point, and REPEAT steps 2,3 and 4, obtaining a NEW GPS FIX for every pair of images.
- Continue taking these pairs of images every few meters along the photo-transect until you reach the natural feature marking the end point.
- Take another photo of your hand to mark the end of the sequence.
- Upload your images using the online form at the bottom of the page. Thank You!
Tips for digital camera surveys:
- When taking pictures underwater, it is important to keep the camera as still as possible to get a sharply focussed image. This is easier to do from under the water, rather than at the surface where waves will make it hard to stay still.
- After holding the camera out of the water to get a GPS fix, check there are no small bubbles in front of the lens before taking your survey images. These will make the image blurry.
- Take images 1.2 to 1.5m above the sea floor along the line between the survey start and end points, according to the survey method.
- At the conclusion of the survey, wash the camera well in freshwater, and get it dry before opening the door to access the memory cards, etc.
- If possible, backup your image data from the memory card onto a laptop, phone, or portable hard drive as soon as possible after the survey